.png)
🌍 How to Join a Minecraft Server on PC
- PixelHost
- 12 ago 2024
- 4 Min. de lectura
Minecraft is the most popular game on the planet, with millions of players enjoying it every day. This popularity comes from an expansive, open world with endless possibilities, from building giant castles to exploring the depths of the Nether. However, playing solo can get lonely over time since you're the only one in your world. Luckily, playing with friends or meeting new ones is easy with our servers. Whether you're on Minecraft's Java or Bedrock editions, we make it simple to start your adventure with other players. These adventures can range from launching a faction war to simply enjoying minigames—everything is possible! However, connecting to your Minecraft server might be confusing for some players, so we’ll show you how to join in this PixelHost tutorial.
🔍 Finding the Server Address

Before you connect to your server, you’ll want to locate the address you'll use. This comes in two forms: a subdomain with letters and an Internet Protocol (IP) address with numbers. Either can be used to join a Minecraft server, with subdomains being a popular choice. These addresses are used in both the Java and Bedrock versions of the game, so it’s essential to know them. With this in mind, follow the instructions below to find the correct information to make the connection.
Go to your PixelHost server panel with the correct account.
Locate the Subdomain and/or IP Address
sections.
Copy or save their respective values for later use.
💻 Joining with Java Edition

Connecting to any Minecraft Java server follows two methods: Direct Connect or adding it to a server list. Some methods might be more desirable than others, but it depends on your preference. The most common method is creating a server list that contains each server you want to join, meaning it’s saved for future use. On the other hand, Direct Connect strengthens your connection for better performance. Regardless of what you choose, these are the only two ways to connect.
📡 Direct Connect
The first method to join your server is Direct Connect, which uses only the address. As mentioned earlier, this method gives you the best chance of connecting since it’s direct. It’s also the quickest method, making it a good option for connecting. With that in mind, follow the steps below to start joining your Minecraft server.
Launch Minecraft and click Multiplayer from the main menu.

Once there, select Direct Connect at the bottom of the screen.

Proceed to enter your Subdomain or IP
in the Server Address field.

Then, click Join Server at the bottom to start connecting.

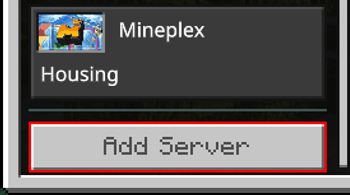
📝 Add a Server
As for the other method, adding servers to a list makes navigation easier if you have many to play on. This is especially useful if you have a large number of servers you want to access. It takes a bit longer than joining directly, but it allows you to save them for later use. As an added benefit, it lets you see the server icon and the Message of the Day (MOTD).
These aspects are what make servers popular for branding or customization purposes. Follow the steps below to start creating your server list.
Open Minecraft and select Multiplayer from the main menu.
Continue by pressing the Add Server button near the bottom right corner.

Proceed to fill out the Server Name field with whatever you like.

Then, enter your Subdomain or IP in the Server Address area.
When you’re done, click Done at the bottom to save the server to your list.
Select the server from the list and click Join Server near the bottom left to connect.

🕹️ Joining with Bedrock Edition

Other versions of Minecraft on PC involve Bedrock Edition, mainly Windows 10 Edition. This is another type of server that differs from Java, meaning there’s a different method for joining. You’ll still use the same IP Address
as before, but sometimes the subdomain might work too. This is more popular for Geyser servers, as it allows both Java and Bedrock connections.
Open your Bedrock Edition of Minecraft and click Play from the menu.

Then, click Servers at the top of your screen to reveal the list.

Scroll past the featured servers on the left, then click Add Server.
Proceed to fill in the Server Name, Address, and Port fields as appropriate.

Important: Make sure to change the default port if you don’t have a dedicated one.
Once everything is filled out, click Save in the bottom right corner.
Select your server from the list and click Join Server in the top right corner.

Wait for the server to accept your connection, which may take a short time.
⚠️ Common Issues
Outdated Minecraft Server
In cases where you receive an “outdated server” error message, ensure you’re using a compatible game version to join. For example, players won’t be able to connect on version 1.18.2 if the server only supports version 1.19.3. However, installing the ViaVersion plugin can resolve this issue by allowing all versions. Sometimes, the error message will directly tell you which version to use, making it easier to adjust in your Minecraft launcher.
No Additional Information
Another common issue is receiving a “connection refused” message with no additional information. This can seem a bit unclear at first, but it basically means the server is offline, or you’ve entered the server address incorrectly. Make sure everything is online and the information is correct to join successfully. Otherwise, switching between addresses and/or connection methods might help resolve the situation.
Server Still Starting
At other times, when trying to join the server, it might still be starting up. This will return a “still starting” message after attempting to connect. Simply wait a few minutes and try again, or restart the server from the panel to see if that helps. However, in rare cases, the issue might originate from internal problems. If you suspect that’s the case, check our optimization guide to troubleshoot the issue.
Unable to Connect to the World
Minecraft Bedrock Edition can sometimes be a bit problematic due to the game’s design, which may give players an error message when trying to connect. This can be due to a wide range of reasons, from incorrect Geyser settings to the world still generating. Resolving it involves re-adding the server to your list and trying again. However, occasionally joining a featured server first before connecting to yours can fix the situation.
Best Regards,
João @PixelHost.

Comments